New Year’s resolutions? What New Year’s resolutions?
I realize it’s just 17 days into the New Year and Chocolate Cream Pie may not have been one of your resolutions. But it was one of mine. When I said I wanted to eat better I meant (you know) better. What’s better than Chocolate Cream Pie?
The older I get the more I realize that the most satisfying desserts are the sugary treats we craved as kids: cookies, sundaes, and anything with chocolate “pudding”. My version of Chocolate Cream Pie is a retro-inspired “pudding” dessert that will make your childhood self proud of the adult you’ve become. So when I say let’s all eat better this year, I mean bring on the Chocolate Cream Pie with its gravity-defying Swiss meringue.
Still, I understand that some of you out there may have meant something else entirely when you resolved to eat better this year. I support that too. In fact you can thank me for this post. By making this Chocolate Cream Pie and posting it here in blogland, I’ve fallen on my sword so to speak.
I made this pie. I ate this pie. I photographed this pie.
All you have to do is pin this pie. There are no calories in pinning. So pin away. Then pop on over to your Chocolatey Treats Pinterest board and virtually eat as much of this pie as you like. Which may be exactly your definition of eating better.
And for those of us who resolved to eat better (in a whole other way) I’ve included the recipe. We can indeed eat better while eating pie. It’s the kind of pie you remember from childhood– cranked up a notch. It’s got a cookie crust and rich topping that makes it both fun and sophisticated. It’s exactly how I define eating better. GREG
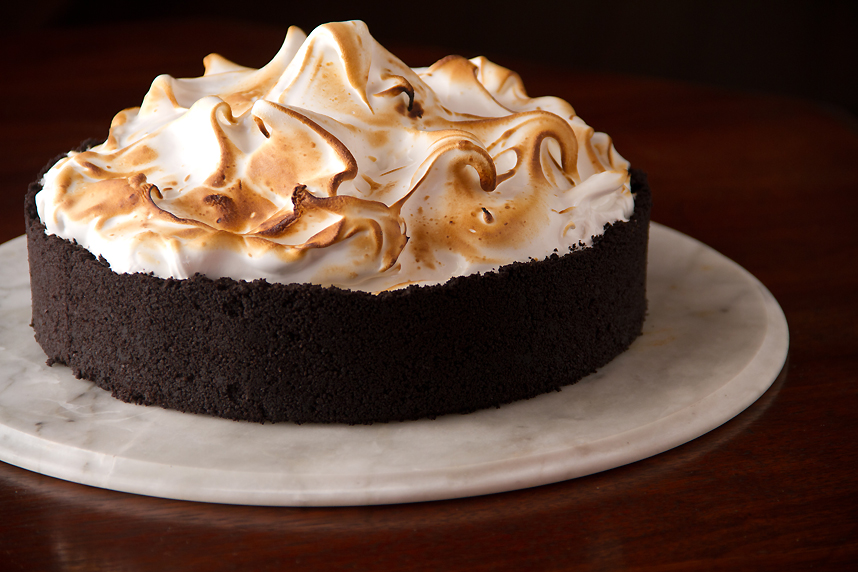
For the smoothest, glossiest peaks be careful not to over beat the meringue.
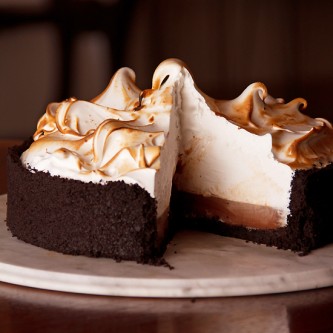
Ingredients
- 12 ounce chocolate wafers
- 8 tablespoon unsalted butter (melted)
- ½ cup milk
- 1 teaspoon unflavored gelatin
- 1 cup heavy cream
- 2 tablespoon granulated sugar
- 8 ounce milk chocolate (finely chopped)
- 1½ teaspoon vanilla extract (divided)
- 6 large egg whites
- 1½ cup bakers sugar (may substitute granulated)
Directions
Place the wafers into the bowl of a food processor fitted with the blade attachment; pulse until finely ground. Transfer to a medium mixing bowl. Add the melted butter, and stir until well combined. Press the crumbs onto the bottom and about 2‑inches up the sides of an 8‑inch springform pan. Cover with plastic wrap and chill at least 30 minutes and up to overnight.
Pour the milk into a small bowl. Add the gelatin, swirling to combine. Set aside to soften in the milk for 5 minutes.
Meanwhile, pour the cream and 2 tablespoons granulated sugar into a small saucepan set over medium-high heat. Bring to a boil, stirring occasionally to dissolve the sugar. Add the gelatin and milk mixture, stirring to combine. Remove from heat and add the chopped chocolate and 1 teaspoon vanilla; cover, and let stand about 5 minutes to melt. Stir the mixture to assure the chocolate has melted properly.
Pour the mixture through a fine mesh sieve directly into the chilled crust; leave any chocolate or gelatin lumps in the sieve to discard. Carefully move the filled crust to the refrigerator to chill uncovered for six hours or up to overnight. You may elect to cover the filled crust with plastic wrap only after the filling has cooled completely.
Place the egg whites and 1 ½ cups bakers sugar into a heat proof bowl. Set the bowl over a barely simmering pan of water. Stir the mixture constantly until the egg whites are a bit warmer than body temperature and all the sugar has dissolved, about 3 minutes. You should not be able to detect any grit when the mixture is rubbed between your fingers. Use the whisk attachment of an electric mixer to beat the egg whites on medium speed until soft peaks form, about 5 minutes. Add the remaining ½ teaspoon vanilla; raise the speed to high and continue beating until stiff and glossy, but not yet dry (about 5 to 10 minutes more depending on your tools and method).
Remove the filled crust from the refrigerator. Using a rubber spatula, drop big heaps of the meringue on top, lifting the spatula to create peaks. Use a kitchen blow torch to brown the top of the meringue. You may alternatively brown the top in a preheated 500 degree oven. Watch it carefully as it will brown quickly.
Chill the pie well before serving. Carefully remove the ring from the spring form pan and cut into 8 slices, wipe the knife clean with warm water after every slice of the knife. Serve immediately.
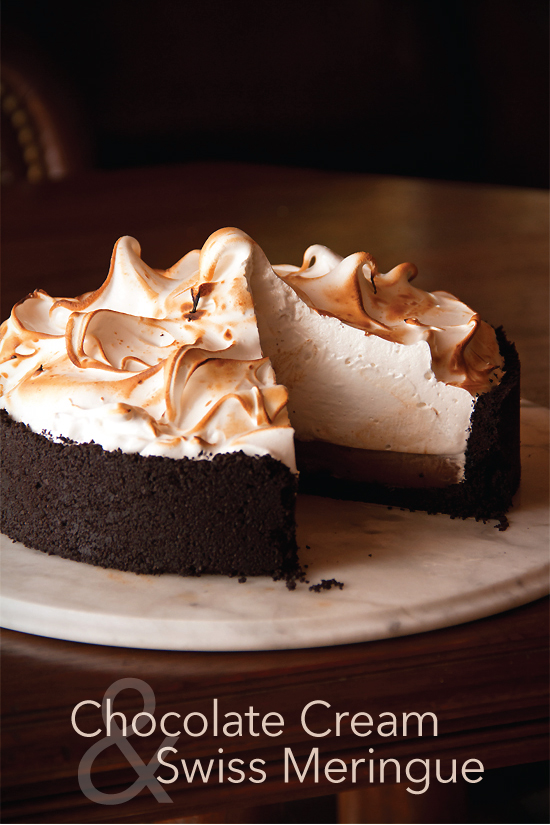


Greg, this was delicious and easy to make but I have a question for you. I prepared my crust and let it set overnight. My chocolate had about 7 hours to set and the meringue about 7 hours. When we cut into it, the chocolate didn’t seem to gel up as I expected and seemed a bit loose. Also, my meringue “slid” off the chocolate. It seemed like maybe it had “weeped” a little and there was a little bit of liquid between the chocolate and the meringue. I beat the meringue as instructed and it was a beautiful Swiss meringue. Any idea why this might have happened? In considering if I would make this again, with some correction based on your feedback, I would increase the chocolate a bit and decrease the meringue to be more of a 50/50 ratio but otherwise, it was a keeper! Thanks for the help with my baking challenges!!
Weeping meringues are hard to diagnosis. The weeping is caused by an unstable meringue, one that is undercooked or that it simply has too much moisture in it. Practice is the only remedy I know. I hope this helps. I’ve never had problems with the chocolate. The version I used in this pie came from Martha Stewart and I always trust it. It features gelatin could gelatin (like yeast) have a shelf life? If you have a filling that has worked for you well in the past you could sub in that one. GREG
I don’t know how I missed this but just saw it on Pinterest and repinned. Whoa, what a beauty! Perfect for un-resolving midway through the year 🙂
Definitely a lot of patience but is worth~
How can I not make this now!? My dinner is ruined because of this picture and recipe. My life will never continue until I have this on my plate.
Gorgeous! Saw it, loved it, pinned it. xo
Damn…I wish I could lick my screen and taste this beauty!
Yes, chocolate pudding with whipped cream was (is) one of my favorite childhood treats — this pie takes it one better! ~Bijouxs
The problem with pinning it is that it is not the same as making and eating it. I live in the real world, the world of Swiss meringue and gooey chocolate. And in my real world, this is going to be my Valentine’s Day dessert. Thanks for sharing the recipe Greg. BTW, I’ve been wondering about all the different meringues out there. Is there a difference between Swiss and Italian meringue? My guess is that they are similar…
I think they are exactly the same. GREG
They’re not the same, though similar. ‘Normal’ meringue — sugar whipped into egg whites — is French meringue. Nice and delicate, but getting the sugar to completely dissolve can be a pain.
Swiss meringue avoids potential grittiness by cooking the egg whites and sugar together over a double boiler (as in Greg’s recipe here). Italian meringue uses a simple syrup (equal parts sugar and water, boiled until the sugar dissolves), which is poured — hot, if I remember correctly? — into the egg whites while beating. It also avoids the grittiness problem, but it does mean you’re adding water into the meringue.
I’m currently making a jaffa version of Greg’s pie — orange zest in the base, more zest steeped in the cream for the panna cotta layer, and Triple Sec in the meringue. Eyeballing my cake tin I have the feeling the panna cotta layer might be thinner than I’d like, so I might end up doing two layers — chocolate and orange, or maybe milk and dark? Either way, I have high hopes. And it’s GREAT to find a recipe that uses up egg whites! I always have a ton left over from making ice cream and custards, and regular meringue-topped pie recipes usually use yolks in the filling and crust.
Terrific. Let us know how it comes out. GREG
It was great! I stuck with one panna cotta layer in the end. The orange flavour came through beautifully and was great with the chocolate — I recommend it! The pie was a big hit and I’ll be making it again. Thanks for a lovely recipe. 🙂
Yay! GREG
Does anyone know how long this pie will past for if kept in the frig? 4 days?
Probably just 2 days. Meringue is an emulsion. It will begin weeping moisture as the emulsion breaks down. GREG
I could kill you! You know I can’t eat that! Ok, am pinning it under “fantasies.”
it looks wonderful!
Thanks!
Well, now you are clever. You know Valentine’s Day is right around the pinning corner. My resolution is to kiss more. xxxx
If eating better includes chocolate cream pie, I am very much in! Love that meringue on top.
This is great. I love this. Looking so nice. I want this in my next Birthday.
Mercy! I’m not a huge fan of dark chocolate. This pie speaks to me. It calls to me. That billowing meringue… the chocolate crust. I’m so there. So pinning. So pining for a slice.
Pinning. Pining. I love wordsmiths! XOGREG
I’m so lucky to be Greg’s neighbor and got to sample this very same pie, and I can assure you that it tastes as good as it looks. The chocolate cream base is perfectly balanced with just the right amount of intensity. I think I might try just making the chocolate bottom layer as a tart; it’s so good!
It’s sized just right for an 8 inch tart. If you use the crust, cut ratios in half. You’ll have plenty. GREG
I’ll eat by candlelight and use the good china and silverware. I couldn’t eat this pie any better than that.
Nice to see a dessert from SS 🙂 I couldn’t agree more about “eating better” maybe I’ll wear a tie at dinner…
That’s a virtual Mount Everest of meringue! Very impressive 🙂
I can’t say I have any firm resolutions, so this pie is more than welcome at our house, regardless of whether it’s January or what. Love those big, beautiful peaks of meringue!
Greg, this looks like an irresistible treat! And I love how you put it together — it would be so attractive to serve to guests. Unless we ate it all before they got here of course…
Eat better. Drink better. That’s my way of thinking for the new year. Also, your meringue is TO DIE FOR.
Lovely! I say, yes, please!
To die for, gorgeous. Nothing like a classic dessert. Happy New Year, Greg!
That does it. I’m off to buy a kitchen blow torch…
You and I definitely mean the same thing when we say “eat better”! This pie looks so, so, good! Totally bringing the inner kid out in me.
Greg, I think you just found the subject matter for your new cookbook! What? You haven’t started your next cookbook yet? Well, with this gorgeous pie, I think you have! Show Wayne Harley Brachman how it is DONE! (I loved the look of his Retro Desserts cookbook, but made a few recipes that simply did not work well. In fact, I was highly disappointed.) I’m with you…have been working with chocolate the past two weeks with nary a thought of “dieting resolutions” for the New Year. Thanks for sharing and have a great weekend, my friend. I think 2014 is going to be an incredible year for you! xo