 Scott Daigre is back. So all you TomatoManiacs can just calm down. He has advice for us this week on getting your precious little babies into the ground.
So read up and take notes.
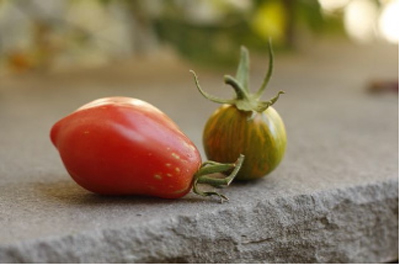
If you like the look of this Polish Paste tomato or the Green Zebra variety and you aspire to a perfect caprese salad come August (and I know you do), then you need to pay attention!
Also, the very first TomatoMania ’09 events were a very big success this past weekend in San Diego. The event moves to Los Angeles this week. You can be sure I will be there. I’ll bring my video camera too. So you can see just how much fun Sup is capable of having in one afternoon. In the meantime, please check out TomatoMania’s website. Hopefully there is an event near you.
And lastly, the New York Times noticed what we were up to and mentioned TomatoMania this week. Click on over there and tell them Sup sent you! GREG
 Dig Deep, Plant Deep.
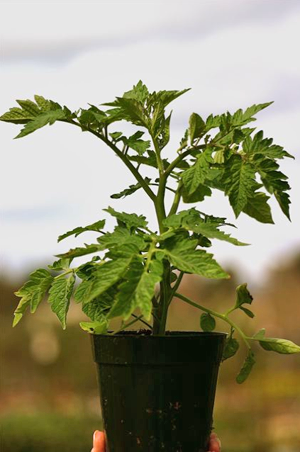
So once you create a strategy and make your choices for this summer’s garden (or you throw out the slightest hint of a strategy and fill your new hybrid with countless tomato plants) it’s time to get them started in your now oh-so-fertile garden plot. Container growers, you’ll go through some of these same motions, only in a different space.
Set out your plants where you want them in your full sun site and then dig holes in those spots. Try to keep the plants two and a half to three feet apart for better air circulation and because many will get big! I know it seems excessive at first but trust me on this. Dig as deep as you can or have the patience for. Tomato roots run deep and the easier it is for them to get going the bigger and better your plants will grow.
Add fresh planting mix and your newly amended soil to the hole(s) and insert your seedling. Fill the hole enough so that only three to four inches of the stem and leaves are above the surface of the soil. If you’ve purchased a leggier seedling you might have eight inches of stem underground. That’s not a bad thing!
Remove any leaves that will be buried, cover the root ball and whatever stem is below the soil surface. A couple handfuls of a well-balanced, organic fertilizer mixed in here will work wonders. In a well amended garden this is the first of only two feedings you’ll need to apply through the season. (The second is in five or so weeks when your plants begin flowering.)
Gardeners in the mountains, midwest and New England (or in any garden zone with intense winters) might choose to dig a trench and lay new seedlings on their sides rather than digging deep at planting time. Soil near the surface will be warmer and foster quick growth.
Regardless of which method you use, tuck your plants in firmly so there are no air holes down around the roots or stem. Remove any leaflets that are touching the ground. New roots will develop all along the buried stem, which gives the plant more stability and provides greater potential for water and nutrient absorption down the road. The root ball is also deeper and cooler, a plus if temps start to rise dramatically.
Follow these same planting guidelines for container tomatoes. Use a large container that won’t heat up intolerably in summer heat. Half barrels, large pulp pots or redwood containers rate high here. (If purchasing a whole new set of pots is completely impractical group them together so the pots are eventually shaded or wrap them somehow to insulate them from the hot sun.)
Mix a premium planting soil mix (you do get what you pay for!) withpotting soil for consistent results. Adding fertilizer at planting time is crucial.
When your seedling is situated in its new home water it thoroughly. At the beginning of the season you shouldn’t need to water that much to soak the small root ball and every third or fourth day should do the trick. Infrequent deep watering is your goal, as your plants won’t like a swampy situation. Is the garden watered with sprinklers and on the same schedule as the grass? Could be a problem.
Add a layer of mulch (shredded bark, straw, more of your compost) after you’ve planted to help protect the new plants and keep moisture levels more consistent.
Container growers, you can probably get away with spreading out watering days early but later in the season you’ll have to make a judgement call based on your site, the size of the containers and the exposure or hours in the sun. Incidentally, since you’ll be the source of most of your plants’ nutrients plan on fertilizing your containers at least every two weeks. Watering flushes last week’s application right out of the pot. Foliar feeding (spraying with a water-soluble fertilizer) intermittently through the season is also a good idea.
Whether in pots or in the ground you’re ready for a great season and you can harvest a bumper crop in either situation. Container tomatoes will usually fruit earlier than their in-ground counterparts so that can be a thrill.
Remember, you’re a farmer now. Inspect your plants daily. That way you’ll know to look closer if something looks a bit out of the ordinary or if things change radically. Quick attention to problems can save your season!
Think good harvest thoughts…

Scott Daigre